Enable Server Subscriptions: The guide begins after the introduction.
What are Server Subscriptions?
You might have heard about the new feature on Discord called ‘Server Subscriptions’ announced on December 1st on their blog. Discord writes that they are expanding the availability of Server Subscriptions.
Server Subscriptions give members the opportunity to subscribe to different tiers of monthly paid subscriptions on your server. A server subscriber will appear on your server as a role (like the Nitro Booster role). To create a subscriber role, the role requires special access to a minimum of one text channel.
With a Server Subscription, you as a server owner can choose what benefits your subscribers will get access to. This can be special channels, exclusive emojis, special role colors, or even extra benefits outside of Discord.
You can create different tiers of subscriptions. The lowest cost of a server subscription is 2,99 USD a month. Discord states that they take 10% of the profit from any purchased server subscription.
There is always a ‘But’
But. There is always a ‘but’. As mentioned Discord is expanding the availability of Server Subscriptions. This means that this feature is not yet available to everyone. At the moment Server Subscriptions are only available in the US.
This got me thinking: is there a way to activate Discord Server Subscriptions outside of the US? After some fiddling,I found out that:
Yes and No. You can activate Discord Server Subscriptions on your server even when you are located outside of the US. Server Subscription will be enabled on your server and available to all members. You can create tiers. Members can buy server subscriptions and you can set up payments.
What is currently an obstacle is that the payment platform Stripe is only accepting payouts to users registered with a valid SSN (Social Security number). Your earnings from Server Subscription are therefore secured on your Stripe account until Discord officially supports payments to non-US citizens.
In this post, I have gathered all the steps on how to activate Server Subscriptions on your server outside of the US. I made this guide mainly for experimental reasons. This will only let you set up Server Subscriptions on Discord’s behalf allowing members to purchase subscriptions and server owners to create and set up different tiers of subscriptions. Payments from Strip to your bank account are not currently supported outside of the US. All your earnings will stay on your Stripe account until Discord supports Server Subscriptions internationally or in your location.
To get payments to your bank account you need to be a US citizen or add someone you can trust to your Team.
How to enable Server Subscriptions on your Discord server
The guide consists of multiple steps. Some steps are easy whereas others can require some more steps and the use of some extra tools. Feel free to skip any steps that you have already fulfilled. You can use the table of contents.
Enable Discord Community

To enable Community go to server settings and select “Enable Community” from the menu.

What is Discord Community? Discord Community provides some extra useful features to your Discord servers such as Member Screenings and Insider statistics. Community is recommended for server owners who are managing public community servers.
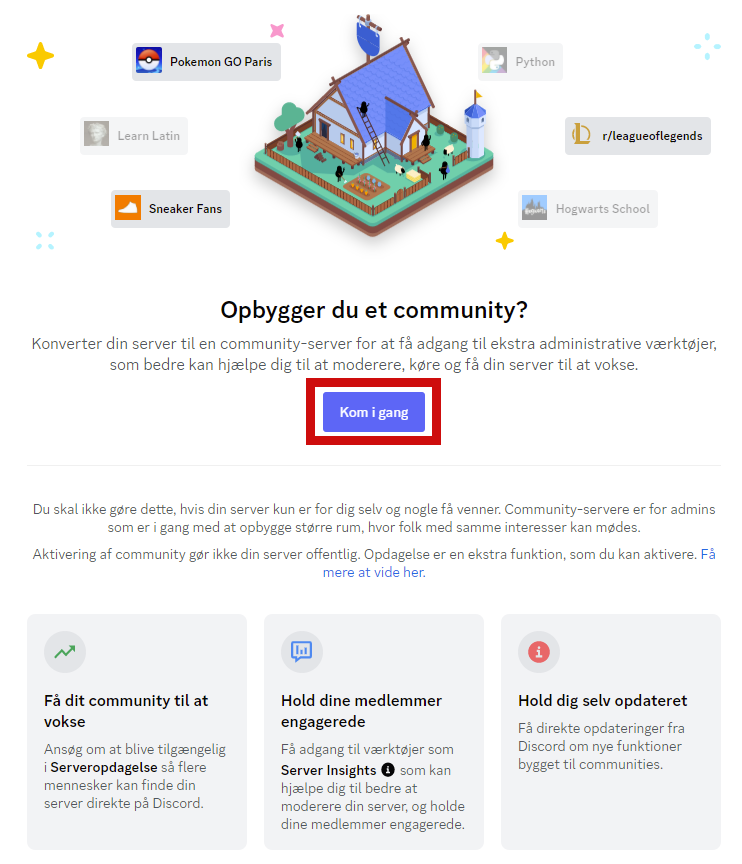
Press “Get Started”.
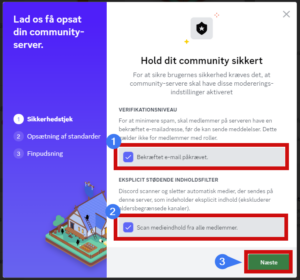
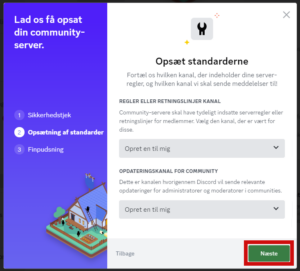
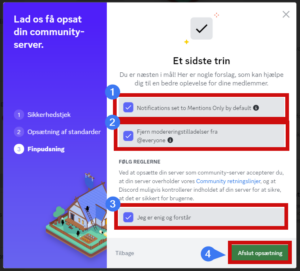
Tick the fields on the first page, and press ‘next’. On the next page press “next” (it is optional to select channels). On the third page the bottom field is required (it is recommended to just tick all the fields). Press “finish set up”
Congratulations you have now enabled Community on your server. If you are serious about your server it is recommended to fill out the settings under “Community” in your server settings but this is not required for the following of this guide.
Meet the requirements for Discord Subscriptions
From the server settings, select ‘Server Subscriptions’ from the menu.
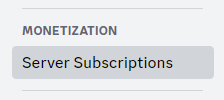

If the ‘Start Earining’-button is orange this means that you don’t meet the criteria for enabling Server Subscriptions. Here you can see the requirements for enabling Server Subscriptions.
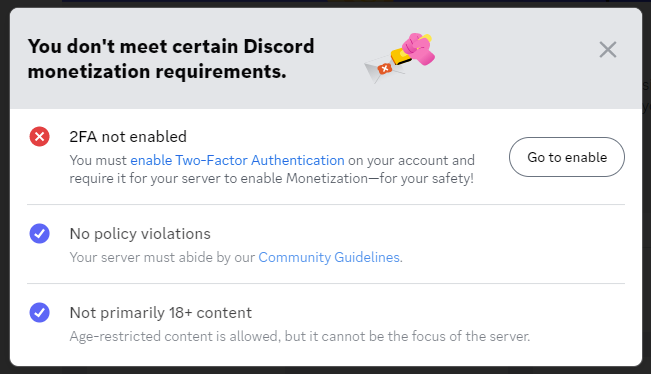
Enable two-factor authentication on your account
If two-factor authentication is not enabled on your account press ‘Go to enable’ as shown in the picture.
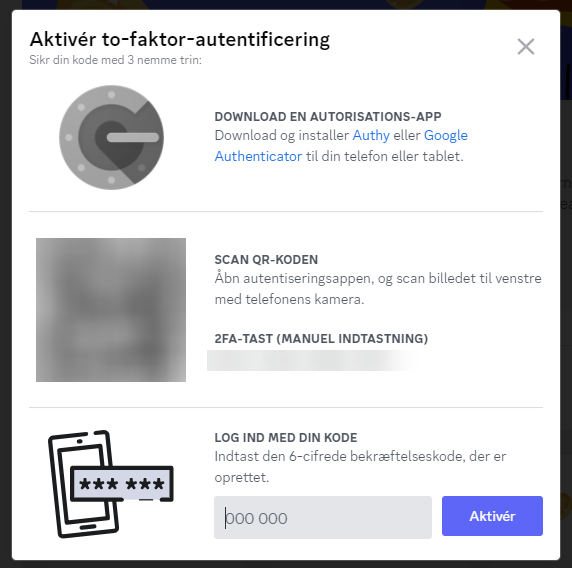
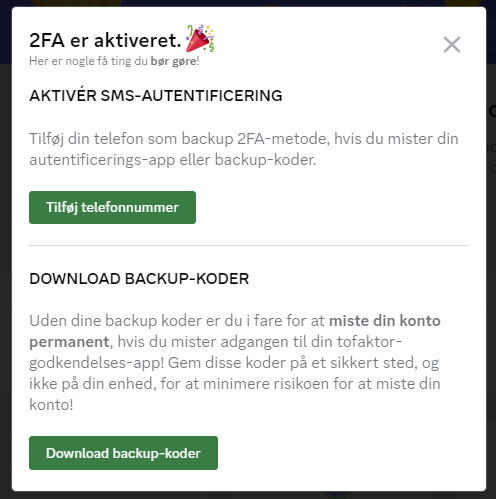
Follow the three steps that pop up on your screen. Keep this information to yourself. It is recommended to add a phone number for extra security. Remember to press ‘Download backup codes’ and print them or keep them secure with a password manager.
Enable two-factor authentication on your server
Even though two-factor authentication is enabled on your account it also needs to be enabled on your server. In the pop-up message from earlier about requirements for enabling Server Subscription, you need to click on ‘Go to enable’ again. This time you are taken to the “Safety Setup” section in server settings.

Enable Server Subscriptions

Go back to the ‘Server Subscriptions’-page in server settings. Here you will see a ‘Start Earning’-button when you have agreed to Discords Monetization Terms and Discord Creator Revenue Policy.
My server's primary language is not English: Enable Server Subscriptions regardless.
Under “Community” in server setting click on ‘Overview’.

From the list regarding “Servers primary language” choose ‘English’. In my case, the ‘English’ option is for some reason blank. Alternatively, leave the option non-selected. The non-selected state is also the default when you activate Community on your server for the first time.

I’m missing language options. You can use a VPN connected to the US for the rest of the setup.
You can use my referral link with NordVPN to get the first month for free with no obligation. You can use the VPN for the rest of the guide and then deactivate it afterward.
Get NordVPN here (referral).
When you are connected, refresh Discord.
Create a Team
Discord requires you to create a Team before you can enable server monetization. The Team contains information about payments and your personal information.
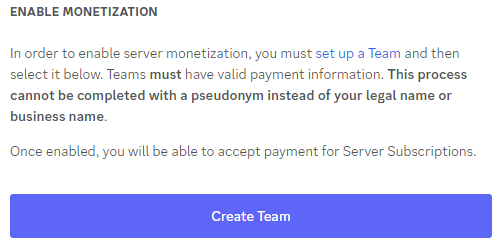
Click ‘Create Team’. You will be directed to the Discord Developer Portal.
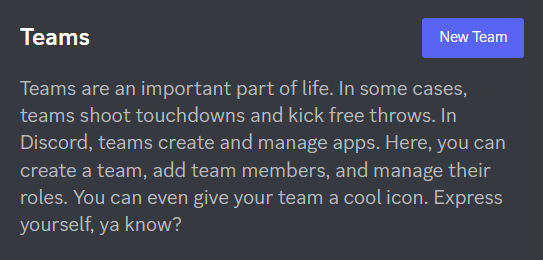
Click ‘New Team’.
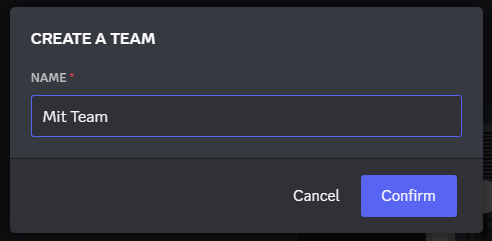
Give your Team a name and press ‘Confirm’.
You will be directed to your Teams dashboard. Here you can change different settings about your team and invite others to your team.
Enable Monetization
Go back to Discord and select your Team from the drop-down menu and click ‘Enable’.

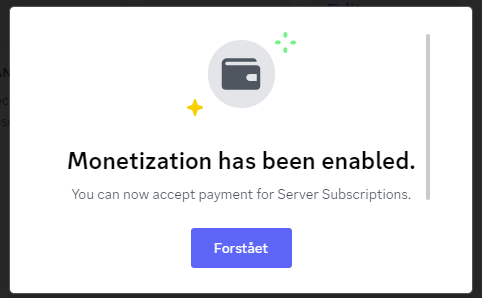
Enable payments: Edit Payment Info
Info: This step connects your Team with Stripe. This step is what enables your members to purchase Server Subscriptions since Stripe is responsible for processing the payments.
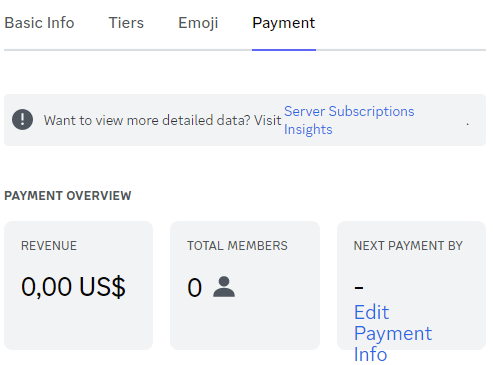
Click ‘Edit Payment Info’. You will be brought back to your Team on the Discord developer Portal. Under “Payment Settings” click the ‘Get Started’-button.
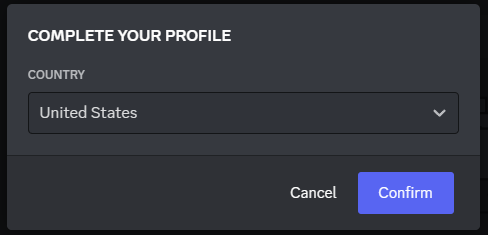
Select ‘United States’ as the country. This is currently the only option. then click ‘Confirm’.
You will be redirected to Stripe. Here you have to enter an e-mail and a phone number. The phone number doesn’t need to be a US phone number.
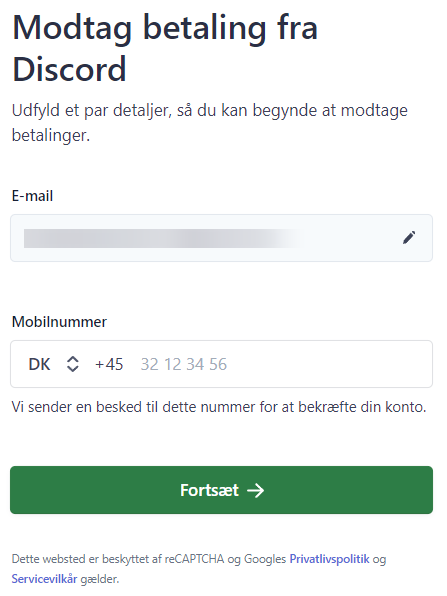
Follow the steps and skip any steps that you are not able to fill out. The only information required right now is an e-mail and your phone number as this step creates your Stripe account.
By entering your e-mail and SMS-code you can always log into your Stripe Express dashboard.
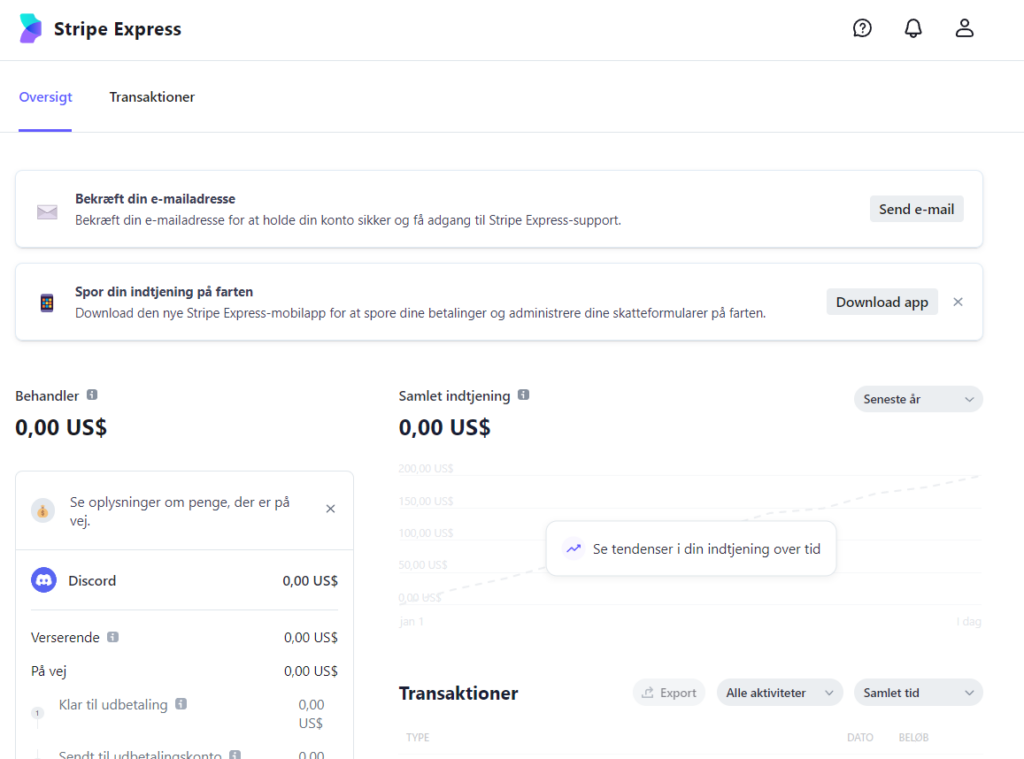
Go to your profile in the top right corner. Here you will find and fill out all your personal information.
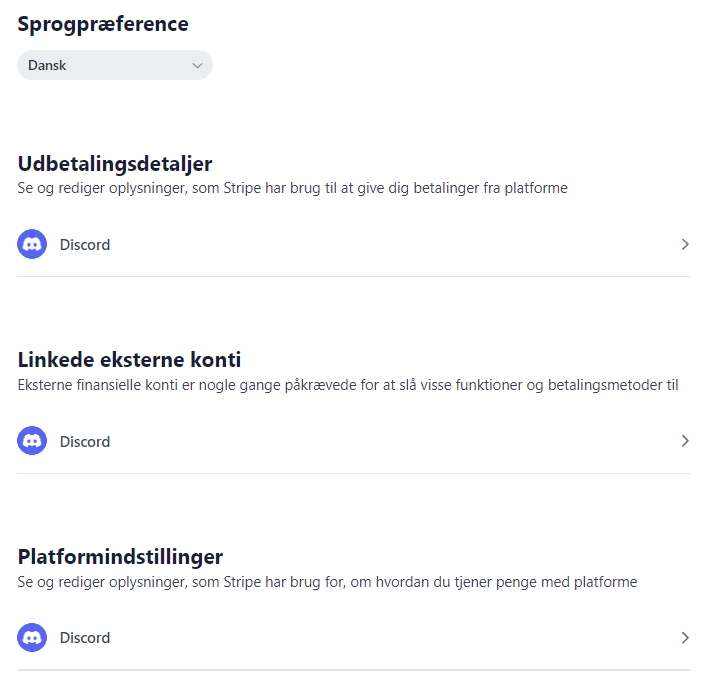
You can select your prefered language.
Stripe: Payout details.
Info: This step adds a US bank account to your Stripe profile. This step is not enough by itself to enable payouts.
Click on the first option ‘Discord’ under ‘Payout details’ as seen in the previous picture in your profile on your Stripe Dashboard.
Here you can add a verified bank account.
I will be using Wise (Transferwise) which is a useful platform for international transfers. Go to https://wise.com (referral) and create an account. Like other platforms involving money transfers, you are required to be validated using your personal identification (passport and picture). This only takes a few minutes. After verification Wise requires you to make a transfer to the site (in my case it was 150 DKK (~20 USD)). Only a small transaction fee is applied (around 0.1 USD using a debit card). The transferred money is now available to you in your Wise account.
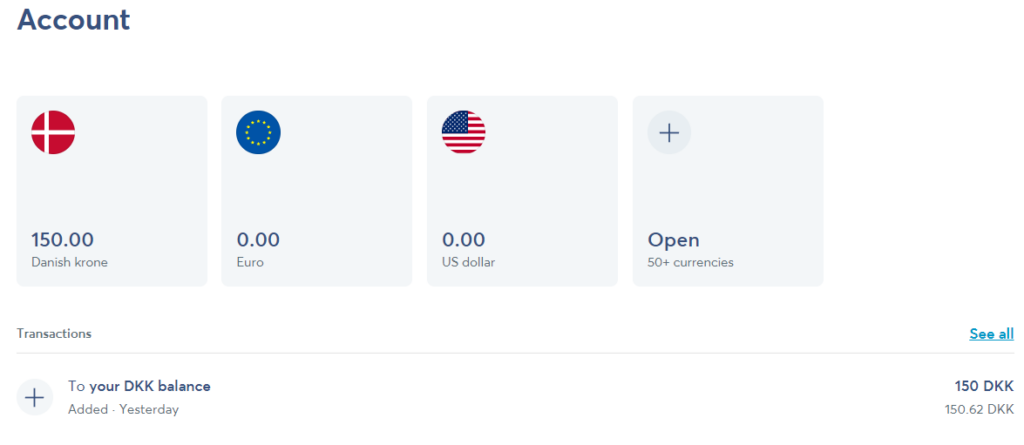
When your account is ready click on ‘US dollar’. Here you will find your banking details. These details can be filled out on your Stripe profile.

You will need the “Routing number” and the “Account number”.
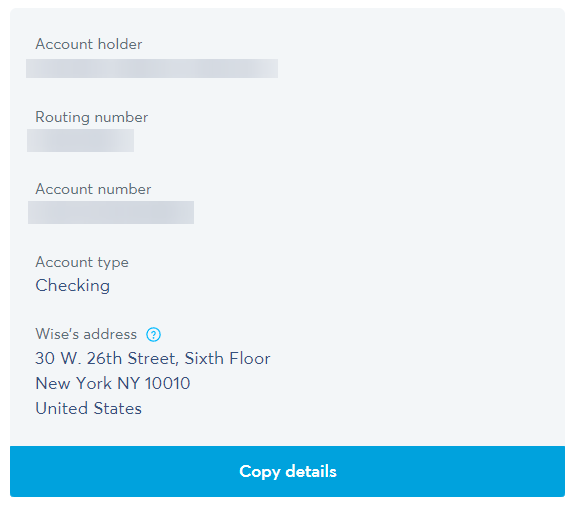
These banking details are like your own bank details and can be used to send money to your account.
Create an account here (referral).
Back on your Stripe Profile, you can now enter your bank details.
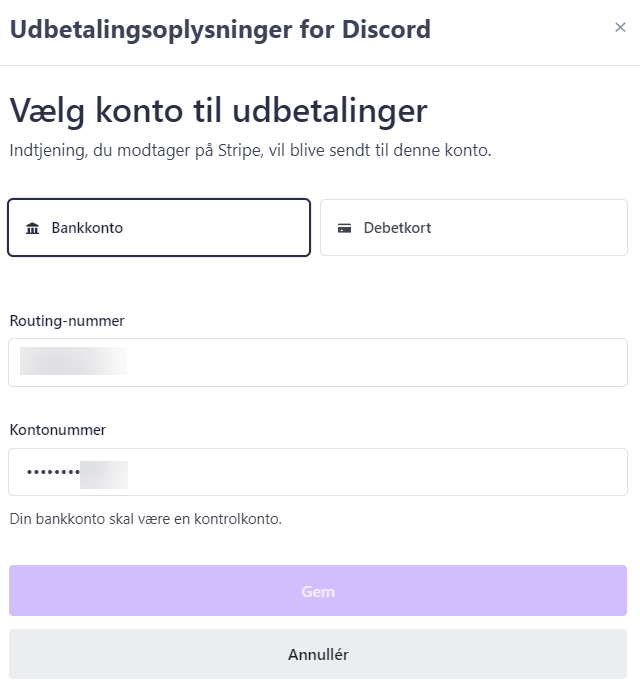
A debit card can also be used if you have access to a US debit card.
Click ‘Save’.
Stripe: Platform settings
Info: This is the step where we are faced with a problem. Since we can’t obtain a US SSN (Social Security number). If you try to fill this in you are met with a warning stating that your payout options have been paused temporarily.
Click on the last setting ‘Discord’ from your profile settings on your Stripe Dashboard under “Platform settings”.
Fill out the details on this page.
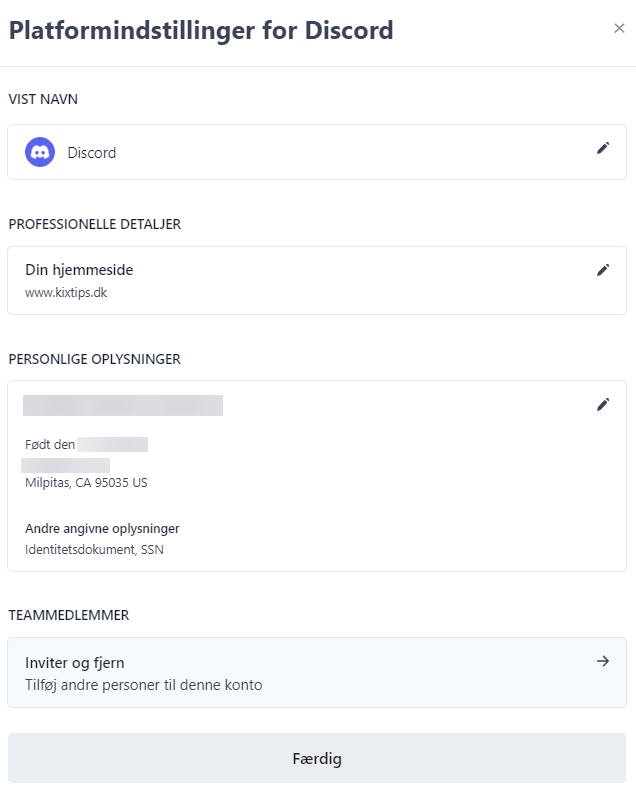
Select a website. You can create your own simple Google Site for free.
Under “Personal details” fill out the following:
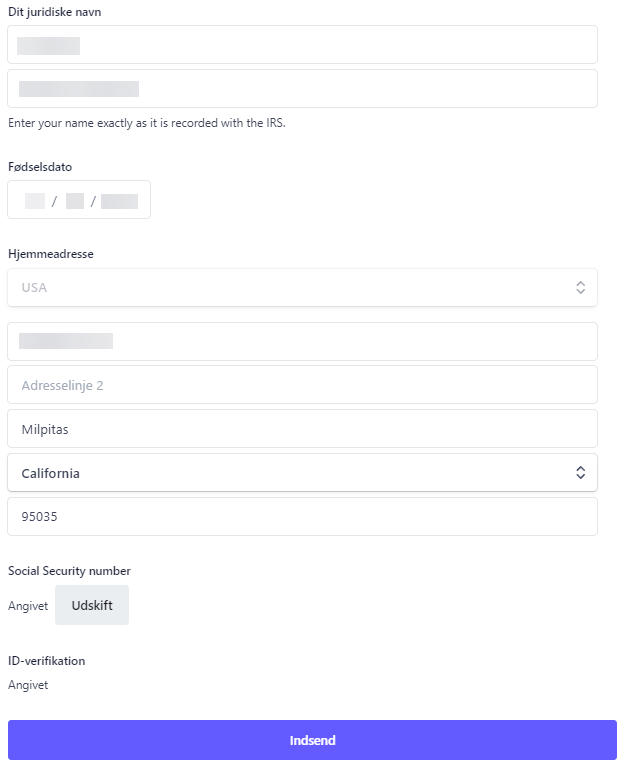
Your full legal name and your birth date. Since the adress needs to be located in the US type in a random address. Stripe fill auto fill the address if you type in the name of a road.
Stripe checks SSNs (Social Security numbers) with the IRS. This means that your details will be denied after a short period. Regardless you are now signed up on Stripe and you will be ready for when Discord officially makes Server Subscriptions available outside of the US and in your region.
At last, you need to validate yourself with your personal ID (passport and picture).
Set up Server Subscription Tiers (roles, pricings, and benefits)
Even if you can’t confirm your personal details on Stripe at the moment you can still set up and customize Server Subscription Tiers on your server.
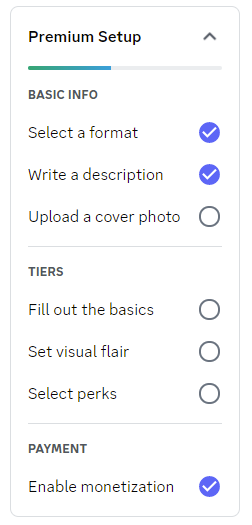
Go to “Server Subscriptions” in your server settings. On the right side, a progression bar is shown. When all the fields are checked your Server Subscriptions are ready.
Click the ‘basic Info’ tab and choose the exclusivity level. (it is recommended to choose “I just want to make some channels exclusive”. This will make Server Subscriptions an option for members.)
Make a short description of your subscription and choose a fitting banner.
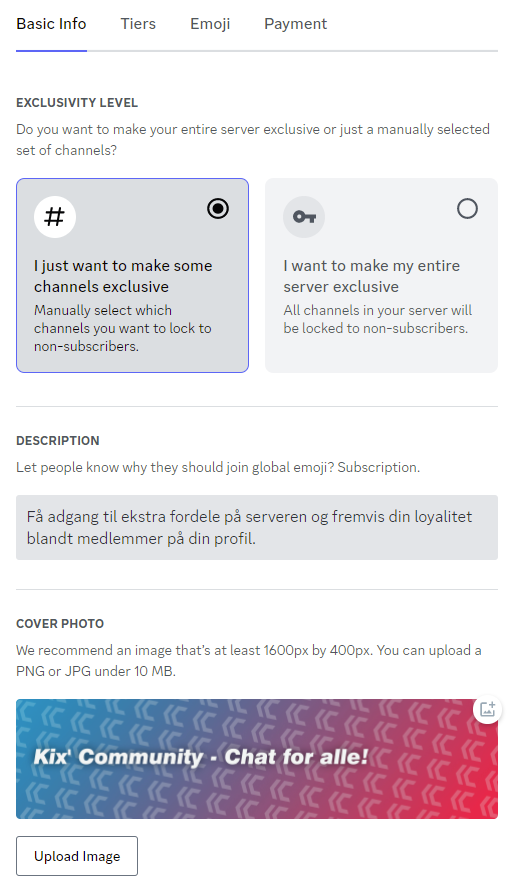
For the next step click on the ‘Tiers’ tab.
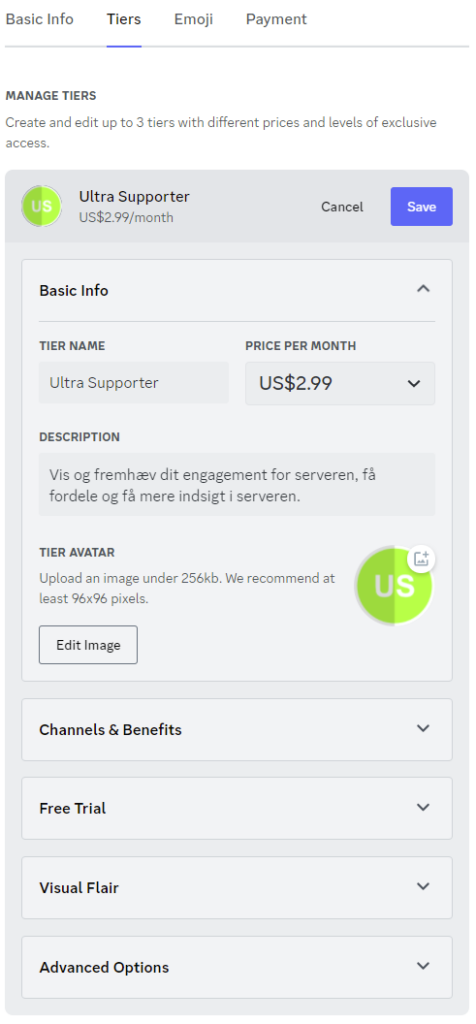
Fill out all the fields to your liking. I have chosen to call this Tier “Ultra Supporter”. I have set the pricing to the lowest option 2.99 USD. I have also uploaded a fitting icon badge.
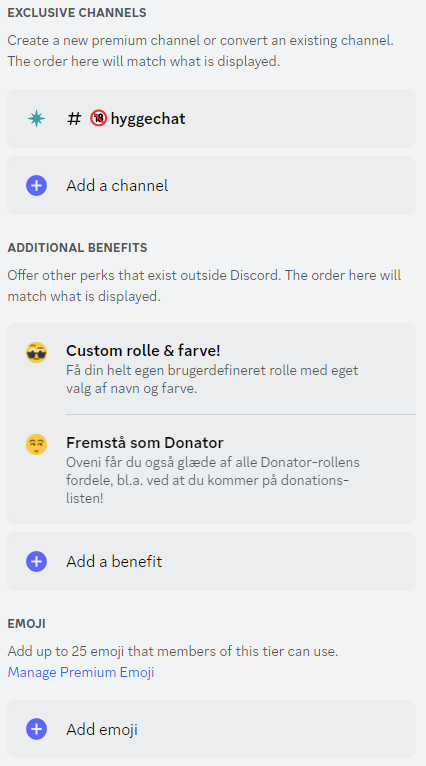
Here is an example of how you can fill out benefits to your subscribers.
Her er et eksempel, på hvad du kan udfylde. Jeg har valgt en kanal, som er låst til kun abonnementer, og jeg har fundet på to fordele. Du kan også tilføje emojis.
Gennemgå alle felterne “Basic Info”, “Channels & Benefits”, “Free Trial” (vælg mulighed for gratis prøveperiode, og periodens længde) og “Visual Flair” (rollens farve og icon).
Du kan oprette flere Tiers med andre navne, priser og fordele
Importer eksisterende roller: Du kan importere eksisterende rollers adgang til specielle kanaler, så du kan oprette abonnementer baseret på andre rollers tilladelser. Men der er ikke nødvendigt at oprette en rolle inden du opretter Tiers.
Vis Server Subscriptions på din server
Din “Premium Setup” progressionsbar er nu helt udfyldt, og dit Server Subscription er nu opsat.
Server Subscriptions er synlig for dine servermedlemmer under navnet på din server.
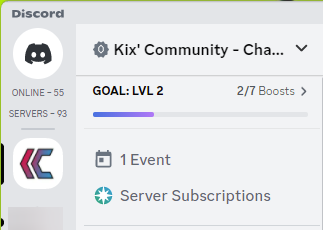
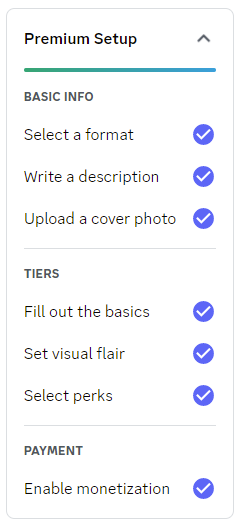
Tilpas din Server Subsrciption Promo Page
Under dine serverindstillinger vil du fra menuen se knappen ‘Promo Page’.
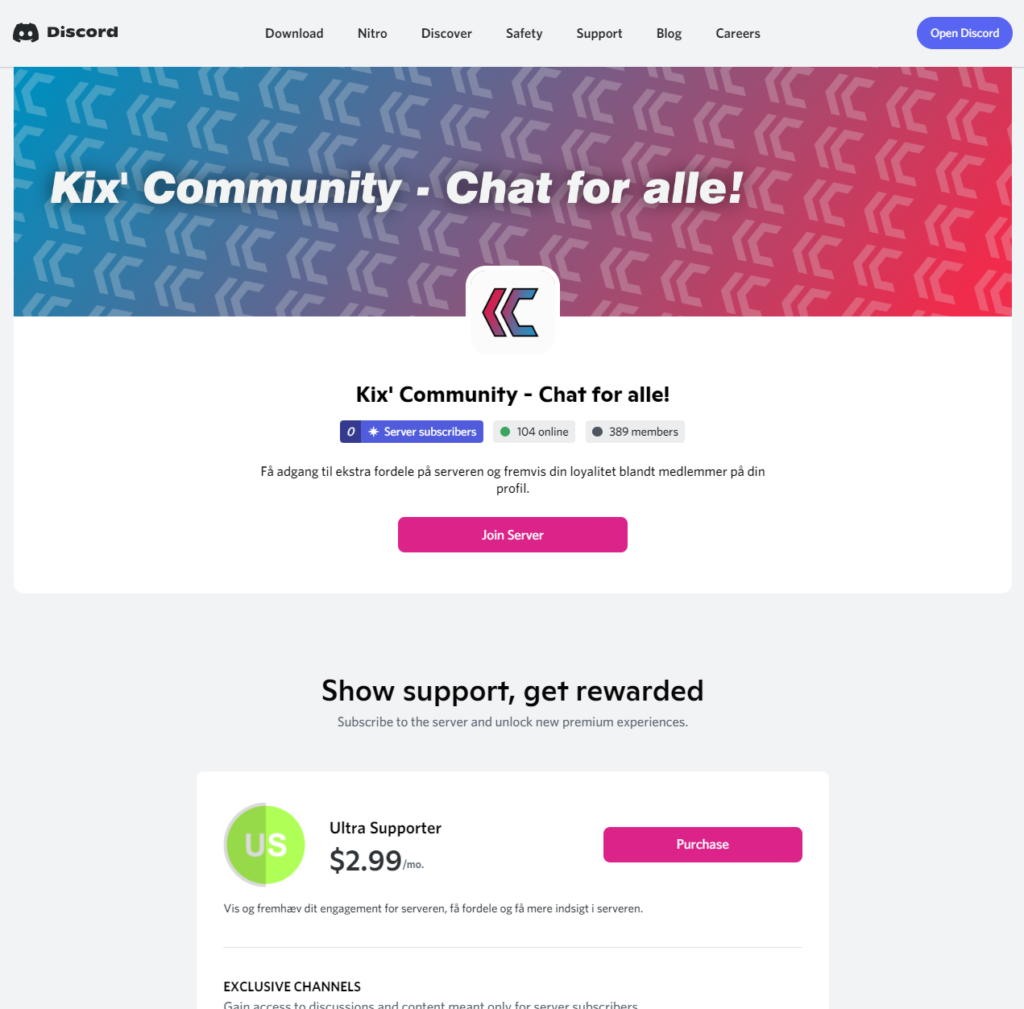
Herfra kan du vælge en farve, en YouTube Trailer og dele din Promo Page URL.
Her ser du et eksempel: Promo Page.

Rounding off & FAQ
We made it to the end. This guide has been an attempt to compile everything I’ve come across as I’ve gone through the setup on my own server.
You mention the use of a VPN, is this required?
On my primary account and server I was only able to enable Server Subscriptions by using a VPN connected to the US and reloading Discord.
But using a 2nd account I was able to enable Server Subscriptions.
My theory is that it is not only IP-bound. But it has to do with the language selected for your server in the Community settings. Try changing this.
Use NordVPN with my referral link to get 30 days of free access wit no obligation. Click here.
You are using Wise.com, is this required?
With Wise you can receive money to an US dollar bank account. From wise you can convert USD to you own currencies with low fees and payout to a local bank account.
You don’t need banking details at Stripe. It is only required that you are connected with your Discord Team to receive payments from Discord to your Stripe account.
But as Discord does not allow for payouts outside of the US your earned money from server subscriptions is secured on your Stripe account.
Create your Wise account using my referral link here.
Do I need to fill out US personal details?
To enable Server Subscriptions you need to connect your Discord team with Stripe by creating your account with your e-mail and phone number.
This will make members able to pay for subscriptions.
But for you to payout the earnings to a personal bank you will need to be a US citizen or add someone to your Team that lives in the US.


Can I payout my earnings?
You can only payout earnings from your Stripe account if you have access to a US SSN. This means that you will need to have someone on your team who have access to this so that you can payout your earnings.
If you find a solution keep in mind that Discord states that you need to have earned at least 100 USD and you need to have an estimated income of 25 USD for the coming month. (Discords Monetization Terms)
How do members buy a Discord Server Subscription?
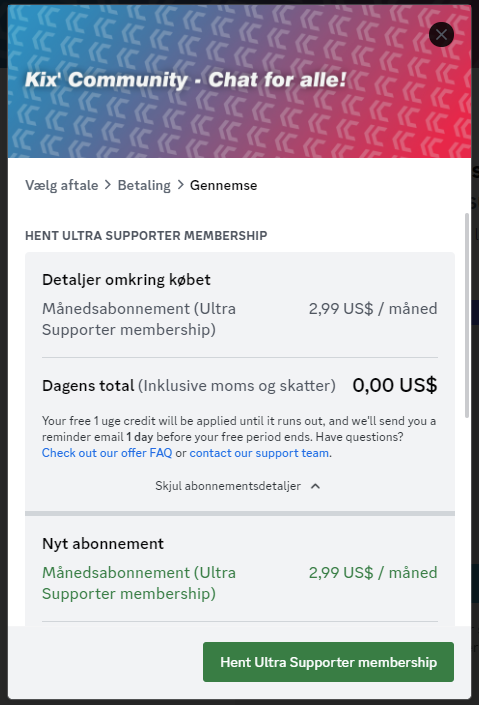
Members can buy a Server Subscription by clicking the ‘Server Subscription’ button displayed on top of the channels on your server or by referring to your Promo Page.
Server Subscriptions are shown on mobile but payments are not yet supported. They need to visit Discord on desktop.
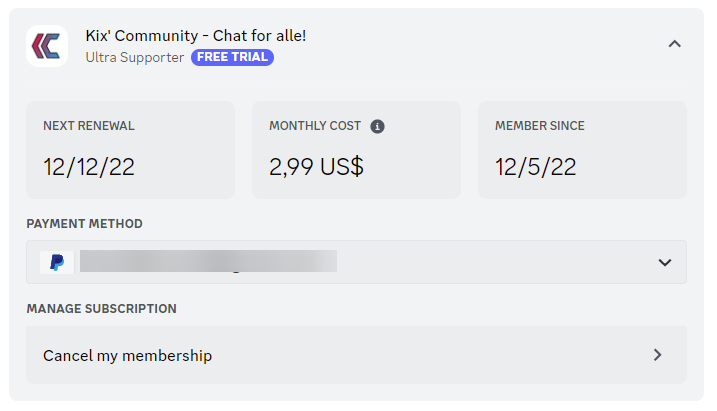
Members can manage their subscriptions on their profile settings in “subscriptions” (also Nitro subscriptions is shown here).
I am not been redirected to Discord Teams on the Discord Developer Portal?
If you are stuck in a log-on screen try clearing cookies and restarting your browser or use another browser for the setup.
Usefull links
Discord Blog: Announceing Server Subscribtions and the Creator Portal, Now Open To More Commuinities: https://discord.com/blog/server-and-creator-subscriptions.
Discord Support: Server subscribtions for members: https://support.discord.com/hc/en-us/articles/4415163187607-Premium-Memberships-for-Servers.
Discord Creator Portal: https://discord.com/creators.
Discord Monetization Terms: https://support.discord.com/hc/en-us/articles/5330075836311.
Discord Server Subscription Policy: https://support.discord.com/hc/en-us/articles/10575066024983.

